Sunday, June 24, 2007

Meerkat drawing


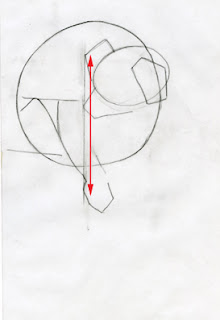
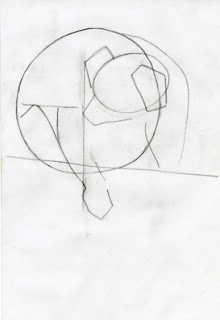
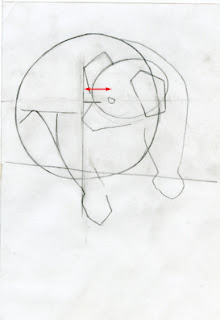
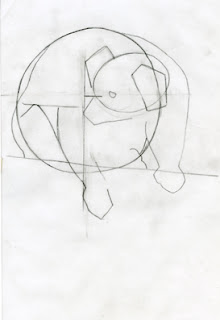
This drawing was done for a friend who retired from work, at the zoo, earlier this year. His favourite animal was the meekats, so what else could I draw as his leaving card!

Just because they're so cute, I went for one of the young ones as my subject. In their first few weeks they have this lovely downy silky look to their entire coat, then as they get older the rougher fur and texture starts coming through. This one was somewhere in the middle of that change. Trying to get that change in fur texture from silky around the head and chest to rough and spikey on the back and body was something I found quite a challenge.

I used 2B, 4B and 7B pencils on an A4 sheet of Epson Matte heavyweight printer paper.

Friday, June 15, 2007

Art group demo evening

Getting there!

On Wednesday evening I drove over the bridge to Undy. A friend of mine, who lives there and attends the local art group, had set up an evening for me to do a ‘demo’ to the small but enthusiastic group. Of the options given they chose pastels as the medium that I would do the demo in.

I had spent about 4 days thinking and planning what piece I would do for them. I have a commission in pastel coming up, so thinking I could combine the two, I had been working on drawing up and preparing that idea. However, it was late on Tuesday evening when I realised that the A3 piece would be too small to do the demo with… they just would not see what I was doing when I stood in front of the group working on an easel. Why I hadn’t thought of this before…goodness only knows! Now it left me in a bit of a muddle.

After a little thought I decided to do a lion head and searched for a piece of pastel board or paper of the right size and colour to use. Of course, Murphy’s Law made sure I had nothing suitable in my possession. I would have to go out and buy some the next day… the day of the demo…. Nothing like doing things last minute!

As the art group met early in the evening, I had arranged to have the afternoon off from the zoo so that I could get home, change and freshen up, pack up the bits and bobs in my car and make my way unrushed over to South Wales. Of course… that little plan has now changed!

So straight from work I nipped across to a local art supplier and found what I was looking for. Rushed home to draw out lion's head.. only to find once I had drawn it out and started to work into it that I had drawn the darn lion on the wrong side of the paper!!!! Arrgghh!!

So with the pressure mounting as time was fast approaching to when I would have to leave, I quickly traced off what I had drawn and started again on the reverse side of the paper. I had originally planned to have a goodly amount of the pastel done so that they could see some finished work as well as watch me add more. However, I managed only to get one ear done before I had to pack all away to load up my car, sort out an overnight bag (I was staying at my friend’s house that night), freshen up, change clothes and get myself on my merry way!

Living just minutes from the M32 in Bristol, when I left I should have been in fairly good time to arrive at my destination…… that was until within ¼ mile of my house I joined a nose-to-tail queue of traffic that stop started it’s way to the M32. What should have taken me less than 5 minutes took nearly ½ an hour due to an accident just beyond the sliproad down onto the M32.

Once past this, the traffic moved fast and freely until I got to the other end of the M32, where I joined another slow moving queue to get onto the M4. By this time I had gone beyond tearing my hair out and sat passively numb biding my time whilst inside my stress increased as I saw my arrival at the art group becoming later and later. Not a good impression to make for a first booking! Only after the junction for the M5 did the traffic heading to Wales thin out and move at a decent pace.

I was hoping to arrive about 5.30pm to set up, as my friend had said that would be the time the organiser of the group would be there. When I arrived at 5.50pm it was to great relief to find that the organiser had only just arrived herself to unlock the church hall where the group hold their art meetings.


The demo itself….
The evening went very well, I think. There were just 12 ladies but they are very enthusiastic and lovely to chat to. I quickly felt quite at ease with them – they are a lovely group. Not many of them had played with pastels – one reason being how messy they are and they certainly hadn’t done much, if anything, in the way of animals. But I hope I have taken away a little of the uncertainty about trying either in the future.
I was using CarbOthello pencils (by Schwan Stabilo) which are pastels in the form of a pencil. The pastel is very soft (very much like charcoal), lightfast, luminous and very easy to blend and smudge. Apparently you can use water with them, though I’ve never felt the want to try this as yet.
In the tea break, a number of them tried out the pencils I had and were impressed by the smoothness of them; some, like me, find other brands of pastel such as Derwent to be a little too hard and scratchy for their own personal liking; and that had put them off using them in the past.

Although I didn’t actually get much more done to the lion, from what I could tell, the group liked the slow approach as they could follow my progress better and ask questions about what I was doing at any point, quite easily. The time sped by very quickly and aware they had a ‘cut off time of 8.30pm, I said, thinking that it was about 8pm, that they should just tell me to stop when they needed to start packing up. The organiser said.. well actually it’s 8.30 now. (!!!!)

This is as far as I got.... I hope to post the finished pic once it's done.

I’m very glad to say that after a stressful time prepping for and getting to the Demo… it turned out to be a lovely relaxing, friendly evening with a great bunch of people. Thank you once again to the lovely ladies who made me feel so welcome.

Sunday, June 10, 2007

Red-ruffed lemur pastel


His name is Charlie and he is one of the younger members of the group of red-ruffed lemurs at Bristol Zoo Gardens.

I started out very much in the same way as I have shown you, sketching out my shapes in a light brown colour so that the lines blended in with the colour value of the finished piece.
It was drawn onto Canson Mi-teintes 160g/m colour 448 Vert océan paper. I deliberately made the branch, he is sitting on, narrower to suit my composition.

The drawing was done as a raffle prize, at the ‘Grand Picnic’ event in Bristol Zoo Gardens, to help raise funds for the M.A.D. for Madagascar campaign being held at all European zoos this year.

Cruise - T minus 209 days and counting.....

How to draw a lemur

There are many different techniques you can use in drawing and the savy artist will learn as many as they can and adapt and use one or more of those techniques according to their style, drawing and/or subject matter etc.

A technique I like to show the beginner, improver or just plain nervous artist is one using simple shapes. I was introduced to this technique in my early stages of drawing and it has ‘saved the day’ many a time for when I was unsure of how to proceed on my chosen subject and by ensuring I had my drawing positioned well on my paper.

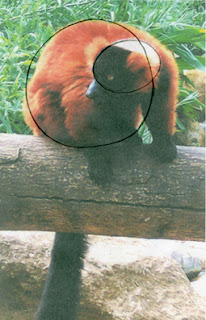
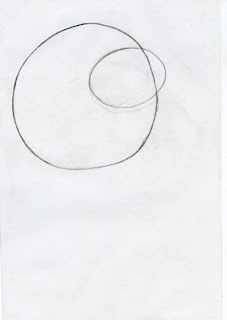
The trick is to learn to see shapes in your subject and to start off drawing the most dominant one first. For example many animals can be started with just two circles or ovals - one large one for the body and a smaller one for the head; though obviously the shape and sizes may vary depending on the animal and it’s pose.

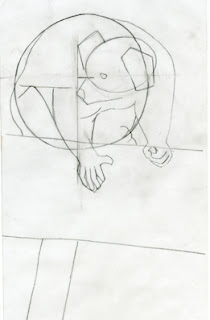
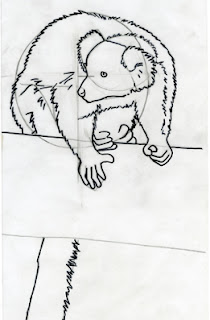
So here I’ll show a series of pictures that build up a lemur from the basic shapes to a finished line drawing.
In this case we are drawing a red-ruffed lemur.


This is the photo I worked from, showing the first shapes I saw in the drawing. When starting out it’s obviously easier to work from a photo, but with practise you can apply this technique to things you draw from life.
And drawing from life is the best way to learn… but that’s not always possible… how many of us have a handy lemur at home to draw?
On your sheet of paper draw those two shapes roughly in proportion to one another.

Remember, by tracing you will learn nothing.

The great thing about using this technique is you learn to plan your drawing and by using the pencil lightly changes and adjustments are easily made. Its at this stage you can look at your two shapes, on your sheet of paper, and decide if where you have drawn them will leave enough room for the rest of the body and tail. If not, simply draw the shapes again in a better position. Because the pencils lines are light drawing them again won’t mess up your drawing unlike having heavy dark lines in the wrong place.

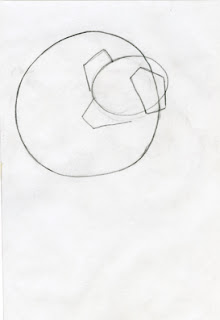
Next add shapes for the ears and muzzle. Don’t try drawing complicated shapes or detail yet. Keep it simple.
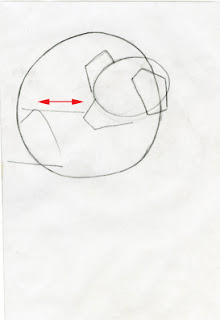
When adding limbs and features always look to see if a straight line vertically, diagonally or horizontally will line up with any other parts of the body – it makes it easier to know where to position them. In this case, I noticed that the top of the leg shape is as good as in line with the bottom of the head oval shape and the ear on the right.

Now add the bottom base line – notice that it does not come at the bottom of the circle. The circle is just a guide, so watch where parts of the body fall in, out or across its shape.

Draw in the front limb; notice that the top sits roughly on the line we used for the rear leg and the outside edge of the hand is roughly in line with the front edge of the ear. There’s no need to draw in the fingers just yet… remember keep it simple.
Taking note of the angle of the branch the lemur is sat on, continue the base line right across as you may notice the wrist of the lemur almost comes down that far. Draw in the line coming under the ear first, note that it starts just under the ears left corner. Once that line is in draw the line from the back down to the base line. Look at the photo and take notice of how far away from the ear this line should be drawn.
To help place the eye, look to see what it lines up with vertically and horizontally. In this case I can imagine lines from the point where the muzzle shape meets the head (horizontal) and from the point where the back of the ear on the left also meets the head (vertical).
Also add the shape for the hand on the right.
Next see how the line of the back flows in and out of the body circle line and draw that in.

Also add the line where the back foot sits, taking note of the shape of gap between the foot and arm.
Lastly draw in the line under the chest and down the right forearm, put in a little shape for the nose, draw in the bottom line of the branch and then the tail.

And to finish off, draw in the fingers. Now we have completed our plan of our lemur. Before diving in and putting in detail and shading do a final check to make sure you have everything in the right place and in proportion to each other. If anything looks wrong you can easily correct it at this stage.
Once you’re happy, you can then take the drawing further by refining your lines, adding details, shading and colour if you wish. This is the stage where you can take your time and put as much work into it as you want.

Friday, June 08, 2007

The Bristol Festival of Nature (BFoN)

I arrived about midday on Saturday – my first workshop was at 1.30pm. It was a lovely sunny day and I held hopes that the festival would be well attended. This year the tents/marques and stalls were spread over a wider area of the Harbourside area of Bristol, so although there were probably as many people as the previous year milling around it did not seem as crowded, which in many respects felt quite nice as it gave you the feeling of not being swamped by people.

My workshops were to show people a technique of using shapes to plan and get a drawing started quickly and easily and was being held at the top the Explore @ Bristol building. This building holds many interactive displays designed to enthuse children with science and engineering. As I walked past the rooms of gadgets and contraptions I felt the child in me pulling me in to play; especially when I saw someone in a huge ‘hamster wheel’ making it rotate which then through a series of mechanical bits made a circulating chain of shiny buckets draw water from a low tank to a higher tank. How cool was that! Alas, I was there to work and I had much to do before my workshop started.

The three rooms being used for the various talks and workshops were very good and specifically built for the purpose. And the schedule of use was tight with just 45 minutes between each workshop/talk for the dismantling of props and equipment of one and the setting up for the next.

The Education Dept from the zoo had arranged to bring down clipboards, an A-frame stand and board, a display banner and various other bits and bobs that I required, and these were all stored in the Zoo tent outside in the Millenium Square next to the Explore building. Luckily the ever helpful Dave (from the Education dept) helped me bring the stuff acros by carrying the large and awkward A-frame stand and board. We had to stop a few times for him to adjust his grip and summon up more energy… it wasn’t an easy thing to carry and must’ve been a bit weighty with the board. Bless him! I was still setting up when the first people, booked on my workshop, arrived!

I had two workshops on both days and on the Saturday one followed more or less straight after the other, albeit in different rooms. The workshops went well, not overly subscribed, but those that did turn up were enthusiastic and left very favourable comments on the evaluation forms they were asked to fill in at the end of each session. The ages of those attended were mostly in their early teens or younger, but I’m glad to say there were a fair number of adults too.

On both days I got them to draw a ring-tailed lemur, following step-by-step instructions from me, as I drew it out on the large board in front of them. I came to the conclusion halfway through the second workshop on the Saturday, that the lemur drawing I was getting them to do was a bit too challenging for the younger children, although they managed it very well considering. But it was quite complicated really, and with only an hour to explain the technique and then draw it out… I felt it was a bit too quick and rushed for them to enjoy it fully. So that evening I drew out another lemur a little less complicated but still something to challenge them for Sunday’s workshops.

Sunday’s workshops were 2½ hours apart so this gave me time to find some delicious sustenance on one of the stalls in the Food Market area. There were lots of lovely goodies and tantalising aromas to get the taste buds going, and a cous cous salad and a large tub of pineapple, mango and strawberry bits later I felt revitalised for the next workshop. I also had a look around the other tents and saw a few people I knew either working or wandering around themselves and met a few new people, which was great.

One new contact could result in a very interesting and exciting project for the future, possibly involving me travelling to Africa to paint to raise funds for conservation research. I’m very excited about the prospect of this possibility but time will tell if it actually happens.

I know from experience how such great ideas and plans can sometimes not happen, despite all best efforts. I was invited to go to Zimbabwe in 2000 to paint for conservation there and just a month before I was due to leave….. Mugabe brought in his land reclamation reforms – the country changed radically and as I was headed for a wildlife conservancy that was once farmland, well… that was the end of that. The trip was postponed in definitely; our safety could not be guaranteed as game parks were being poached clean of wildlife and the vegetation felled or uprooted and workers threatened/injured or even killed. I still hope that one day Zimbabwe can return to being the great country it was for conservation and its people.

Back to the BFoN…..
Most of those who came to my workshops were either beginners or just felt they couldn’t draw, but wanted to have a go. The technique of using shapes, to start a drawing off, helps to overcome the ‘where to start a drawing’ dilemma; a prospect that some people find so daunting that it puts them off having a go. And for those that have a little more experience it helps to plan placement and proportions of the subject(s).
Hopefully the workshops gave a good base, for those that attended, to work from and gain more confidence with their drawing.